Thứ Sáu, 9 tháng 5, 2008

It has been quite a while since I posted a new pattern... for this I apologize, so here is a Springy pattern.

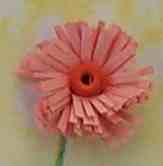
This is a Trellis with Yellow and Purple Flowers

To Make the Trellis:
  • 2 - 3 in (7.6 cm) brown strips
  • 4 - 1.5 in (3.8 cm) brown strips
  • Using the picture as a guide, lay the 3 inch (7.6 cm) strips lengthwise and criss-cross the 1.5 inch (3.8 cm) strips

To Make the Flowers:
  • 8 - 3 inch (7.6 cm) Yellow Hearts
  • 2 - 3 inch (7.6 cm) Purple Tight rolls
  • 4 - 1.5 in (3.8 cm) Green V-Scrolls cut to 1/16 inch (.15 cm) wide
  • 3 - 3 inch (7.6 cm) Green S-Scrolls cut to 1/16 inch (.15 cm) wide
  • 3 - 3 inch (7.6 cm) Green Shaped Marquise leaves cut to 1/16 inch (.15 cm) wide
Using the picture as a guide for placement make
  • 2 flowers with 3 Yellow Hearts and 1 Purple Tight roll, attach V-Scroll to Purple Tight roll as shown
  • 2 flowers with 1 Yellow Heart attach V-scroll to point of heart
  • Use remaining S-Scroll and Shaped Marquise as shown
I hope that you enjoy this pattern :-)

Enjoy!
Copyright for Personal Use Antonella DeFalco

Technorati Tags: , , , , , , ,

Chủ Nhật, 16 tháng 3, 2008

free quilling pattern flower girl
I want to give a special Shout Out to my friend Toni - who inspired this pattern and to my friend Marie who always makes me smile ...

This very happy Flower Power Girl is ready to brighten up anyone's day... She is perfect for a card or scrapbook page. This particular beauty was framed and given as a gift.

To Make Her Dress
Bodice - use 1/8 in (.3 cm) wide quilling paper
  • 1 - 8 in (20.32 cm) Purple Marquise
  • 2 - 4 in (10.16 cm) Purple Marquise for her sleeves

Skirt - use 1/8 in (.3 cm) wide quilling paper and 1/4 in (.6 cm) wide for fringed flower
  • 1 - 6 in (15.24 cm) Pink fringed flower
  • 2 - 8 in (20.32 cm) Red Marquise (outside)
  • 2 - 6 in (15.24 cm) Red Marquise
  • 2 - 6 in (15.24 cm) Pink Marquise
  • 1 - 4 in (10.16 cm) Red Marquise (center)
  • Arrange as shown
Tip: Place the large red Marquise on the outside and layer the remaining Marquise alternating color on top to give dimension to the skirt. You can always add more Marquise for a fuller look.

Arms, Legs and Hair
  • 2 - 3 in (7.62 cm) White strips for arms
  • 2 - 6 in (15.24 cm) White strips for legs
  • 2 - 3 in (7.62 cm) Purple Tight Coil for heel
  • 2 - 6 in (15.24 cm) Pink Tight Coil for front of shoes
  • 1 - 48 in (121.92 cm) White Tight Coil for her face
  • 5 - 4 in (10.16 cm) Pink Spiral for her hair

You can mix and match colors to match any card or layout. She was the starting point for a very happy cheerleader for my niece, I altered that design a bit and will have to share that one another day.

I hope you have as much fun as she is!

Enjoy!
Copyright for Personal Use Antonella DeFalco

Technorati Tags: , , , , , , , ,

Chủ Nhật, 2 tháng 3, 2008

quilling pink artist
Yeah!!! I finished my squares for Monica (Girl Gone Thread Wild)...

This was quite a challenge for me since I work with paper to put something that is my craft onto fabric, but Monica was very encouraging and here are the fruits of my labor :-) I have a friend at work who is facing a difficult time right now and I am praying that everything works out well for her. Tina, these squares are for you!

I titled them Love and Hope. I realized early on that I could not glue the quilling to the fabric or it would certainly fall off, so I made them more like charms on a pendant and I hung them that way! I also coated them with a product called "paper glaze" to give it a glass-like appearance.

quilling pink artist
If I had started earlier, I probably would have re-done the glitter...

but such is life... I promise to do better next time.

Technorati Tags: , , ,

Thứ Ba, 12 tháng 2, 2008


To continue my lesson on the basic shapes, these instructions are for the Spiral Shapes. You can click here if you have questions about cutting your own paper quilling strips.

The picture shows the basic spiral shapes, please click on the picture to see a larger image with more detail. I will explain how to make the following shapes: Loose Scroll / Open Coil, S-Scroll, C-Scroll, Heart Scroll / Open Heart, and Spiral shapes.

All of the shapes in the attached picture were made using 4" (10.2 cm) pieces of quilling paper in the 1/8" (.3 cm) width.

General Tips:
With these Scroll shapes, since you are not gluing the ends, it is not necessary that you tear the end. Often times, if it is a shape where the end is visible, I will cut the end at an angle so that it tapers. Otherwise, tearing or cutting produce similar effects as the end is in the center of the shape and is generally not visible.

Before we go too far, I wanted to talk about something that you will hear quillers (or any paper artist) talk about and may not know what the reference means. The term is called "conditioning the paper." The best way I can explain this to you is to make you think about what you do to ribbon on a present. With that in mind, you take your finger nail and run it along the end of your quilling paper. The end result is a strip that begins to curve. You can get the same effect by using your needle tool or a pin. The reason you want to do this is that it loosens the fibers in the paper and makes it easier to shape. By looking at the way the paper curls you can also see the natural curve of the paper.

Loose Scroll / Open Coil

  • Place the quilling paper in the slot at the very top of your slotted tool or at the top of your needle tool or corsage pin
  • Holding the loose end of the paper in one hand and your tool in the other hand, begin turning the your tool gently pulling the paper
  • Keep an even tension. For this shape do not pull as tightly, keep a looser tension so that the shape will open up when pulled off the tool
  • Keep the edges of the wound paper as even as possible. This prevents creating a little pop-up in the center of your shape. Some people will call this a belly or a tornado.
  • When you get to the end of your strip, pull the coil off the tool. If using the slotted tool, it is easier if you turn the slotted tool approximately 1/4 turn in the opposite direction before pulling the paper off.
  • After pulling the paper off, let the coil open up.
  • Do not glue the end, leave it open.
  • This shape is actually kind of neat to use - it gives a very loose look to many patterns that you might use the loose coil for, and if you use your imagination think of waves, clouds, even musical notes, so many options... just with changing the length of the coil

S-Scroll

  • This shape gets its name because it looks like an "S" when finished
  • For this shape condition both ends of the strip such that one end is curved one direction and the other end is curved in the other direction (creating a loose S shape)
  • Place the quilling paper in the slot at the very top of your slotted tool or at the top of your needle tool or corsage pin
  • Holding the loose end of the paper in one hand and your tool in the other hand, begin turning the your tool gently pulling the paper
  • Roll the paper in toward the center starting at one end and then moving to the other end once you reach the approximate middle of the strip
  • Remember, to roll each end of the strip in opposite directions
  • This creates a shape where both ends are approximately the same size, this can be changed by making one end smaller than the other simply by changing how far down the strip each end is rolled.
  • Play around with this to see the difference it can make.
C-Scroll

  • This shape gets its name because it looks like a "C" when finished
  • For this shape condition both ends of the strip such that each end is curved in the same direction (creating a loose C shape)
  • Place the quilling paper in the slot at the very top of your slotted tool or at the top of your needle tool or corsage pin
  • Holding the loose end of the paper in one hand and your tool in the other hand, begin turning the your tool gently pulling the paper
  • Roll the paper in toward the center starting at one end and then moving to the other end once you reach the approximate middle of the strip
  • Remember, to roll each end of the strip in the same direction / toward eachother
  • This creates a shape where both ends are approximately the same size, this can be changed by making one end smaller than the other simply by changing how far down the strip each end is rolled.
  • Play around with this to see the difference it can make.
Heart Scroll / Open Heart

  • Take the quilling paper and fold it in half
  • Next, condition the paper the same way as for a C-Scroll by conditioning both ends of the strip such that each end is curved in the same direction, since the paper is folded this creates a loose V-shape
  • Place the quilling paper in the slot at the very top of your slotted tool or at the top of your needle tool or corsage pin
  • Holding the loose end of the paper in one hand and your tool in the other hand, begin turning the your tool gently pulling the paper
  • Roll the paper in toward the center starting at one end and then moving to the other end once you reach the approximate middle of the strip
  • Remember, to roll each end of the strip in the same direction / toward each other
  • Roll until you get to the bottom, or the fold and then start rolling the other end. Now adjust the heart to the size you want by pulling the coils
Spiral shape

  • To make this shape a needle tool, dowel, knitting needle or some such tool to create the spiral shape.
  • A trick is to moisten the end of the strip, either by using a moist towel or sponge.
  • Take the quilling strip and wrap it around the selected tool.
  • Start at the tip and continue to wrap up the length of the tool.
  • When approaching the end or handle, start sliding the paper off of the front of the tool so that you can continue to wrap the spiral shape until you reach the end of your quilling strip.
  • A neat use is to take very long strips (by attaching them end to end) and outline a photo - not an easy task to keep it even when using long strips

Enjoy!
Copyright for Personal Use Antonella DeFalco

Technorati Tags: , , , , , , ,

Thứ Tư, 6 tháng 2, 2008

There have been many questions about making the basic quilling shapes that I have received lately, so I thought that I would revisit the basic coil shapes here. You can click here if you have questions about cutting your own paper strips.

You can click on the picture to see a larger image of the basic coil shapes. I will explain how to create the following shapes: Tight Coil/Tight Roll/Peg, Loose Coil, Teardrop/Raindrop, Marquise/Marquis/Eye Shape, and Heart. These were all made with 4 in (10.2 cm) strips in 1/8 in (.3 cm) wide paper.

free quilling coil shapes instructions


Some helpful hints:
  • Use a ruler to measure the length of your strip to get uniform lengths.
  • It is generally recommended that you tear instead of cutting your paper. The reason for this is that the tearing creates a feathered edge that blends and is not as noticeable as a cut line.
  • When making a shape that you pinch, try to pinch at the point where the piece is glued and/or try to align the glued portion to where you join two or more quilled elements.
  • Always begin your quilling by first conditioning the paper. This is done by running your fingernail or needle tool or similar along the end of the strip. The paper will begin to curl as the fibers are broken down.
  • White glue is best, before all of the choices with the growth of paper crafting, elmers glue was used and those quilled beauties are still glued together.

Tight Coil/Tight Roll/Peg Shape
  • This shape is called by many names in different patterns, so I have listed the more common ones
  • Place the quilling paper in the slot at the very top of your slotted tool or at the top of your needle tool or corsage pin
  • Holding the loose end of the paper in one hand and your tool in the other hand, begin turning the your tool gently pulling the paper
  • Keep an even tension, pulling the paper as tight as possible. You want the final shape to be very tight.
  • Keep the edges of the wound paper as even as possible. This prevents creating a little pop-up in the center of your shape. Some people will call this a belly or a tornado.
  • When you get to the end of your strip, pull the coil off the tool. If using the slotted tool, it is easier if you turn the slotted tool approximately 1/4 turn in the opposite direction before pulling the paper off.
  • Carefully glue the end of the paper, using just a small amount (dab) of glue.

Loose Coil Shape
  • Place the quilling paper in the slot at the very top of your slotted tool or at the top of your needle tool or corsage pin
  • Holding the loose end of the paper in one hand and your tool in the other hand, begin turning the your tool gently pulling the paper
  • Keep an even tension. For this shape do not pull as tightly, keep a looser tension so that the shape will open up when pulled off the tool
  • Keep the edges of the wound paper as even as possible. This prevents creating a little pop-up in the center of your shape. Some people will call this a belly or a tornado.
  • When you get to the end of your strip, pull the coil off the tool. If using the slotted tool, it is easier if you turn the slotted tool approximately 1/4 turn in the opposite direction before pulling the paper off.
  • After pulling the paper off, let the coil open up
  • Carefully glue the end of the paper, using just a small amount (dab) of glue.

Teardrop/Raindrop Shape
  • Start with the Loose Coil and pinch the glued end, creating a point on one side and leaving a rounded end opposite the point
  • When pinching use thumb and index finger

Marquise/Marquis/Eye Shape
  • Start with the Loose Coil and pinch both the glued end and the opposite end of the coil
  • Pinch one end then the other while holding the pinched ends one in each hand. This helps to create a more even shape.

Heart Shape
  • Start with the Loose Coil and pinch the glued end creating a point
  • While holding the pointed end in one hand, press the rounded end in with a fingernail.
  • This creates and indentation creating the heart shape.

I hope you find this helpful and this will encourage you to try quilling.

Enjoy!
Copyright for personal use Antonella DeFalco

Technorati Tags: , , , , , , ,

Thứ Năm, 20 tháng 9, 2007

slotted quilling tool
Slotted or Needle Quilling Tool

I found that when I first started quilling I used the “Slotted” tool. This is a metal or plastic instrument with a tiny slit or slot at the top. The slit is where you place the paper. When I started quilling this was my favorite tool because I found it easier to turn the paper. This was more of a coordination thing, and as I became more comfortable with making my coils and working with the thin paper I relied on it less and less. Today I use the slotted tool when I make my folded roses and sometimes when working with fringed paper. I have found that using the slotted tool will give a larger hole in the center. Please note: For some quillers and projects, you want this look, so don’t discount this tool for that reason.

As my quilling skills improved, I began using the “Needle” tool, mine has a wooden handle with a long, thin piece of metal that looks like a needle sticking out the top. I have actually used this tool for things that it may not have been designed for, such as pricking or piercing my paper and to place glue on my projects. Strictly speaking, using the tool for glue placement is not recommended because it can cause your needle to rust (so don’t tell anyone).

Along the lines of the needle tool, I find that I use a corsage pin or any pin for that matter for much of my quilling today. I have even been known to use office supplies, primarily the T-pins that many people use to hold paper to their cube walls. I find that my control over my paper is better and I am able to get a tighter center to my coils this way.

When I teach classes or give people a pattern that I have made, I will provide round toothpicks. I do this because I worry that someone might stick themselves with a pin if one were supplied. We don’t want any DNA for the CSI team to find 

Perhaps the most common tool that most of us have readily available is our hands. That’s right, it is called finger rolling, and you roll the strips of paper in your fingers. This tool is particularly useful because you never leave it at home!

Enjoy!
Copyright for Personal Use, Antonella DeFalco

Technorati Tags: , , , , ,

Chủ Nhật, 9 tháng 9, 2007

Showers, Quilling and Love! A quilled bridal shower card that I made recently. This pattern is more of a guide than a step by step pattern. This is an example of using quilling to accent patterned paper.

  • I love square cards, so I started with a 6x6 square white blank.


  • Selected patterned scrapbook paper with a large floral patterned design.


  • Printed "Love Unconditionally, Laugh Uncontrollably, and Live Unexpectedly Free!" and attach at a diagonal.


  • Affix a tag to the phrase, and place a 4 inch (10.2 cm) Coil Heart to the tag.


  • Using white and gray quilling strips create quilled patterns to place over the patterned design on the paper.

I found a quote that I particularly liked and printed on the inside of the card:
"Love does not consist in gazing at each other, but in looking together in the same direction." - Antoine de Saint-Exupery

I really love to make cards like this. They are quite elegant in their simplicity, and can be quite effective in a pinch.

Love is in the air!

Enjoy!
Copyright Personal Use - Antonella DeFalco

Technorati Tags:
, , , , , ,

Thứ Ba, 4 tháng 9, 2007

Quilling Strips - Should I Cut My Own Strips?

So many people ask about quilling strips and if they should cut their own papers. This is such a personal choice, but I will provide some information for those of you who decide to cut your own paper.

For those of you brave enough to cut your own paper here is some information that may help you when selecting the paper. Not to be cheeky, but you don’t want your paper to be too thick or too light. If it is too thick or heavy it is harder to roll, and if it is too light it will not keep the coil shape as well. A good weight that has been recommended to me is the 65 to 80 pound text paper. I have used the better quality printer paper and the light weight scrapbook paper that is available. I know that many of my quilling friends like to use envelopes as this is generally a good weight and has the advantage of recycling the mail. Included in this is the inside of the business envelopes - the pattern on the paper makes for really neat fringed flowers.

You want to make sure that the paper you are using has a good “color fastness” The best way I can explain this is that you do not want your paper to “bleed” when you glue it as this can damage or ruin your project. The bleeding can happen because the glue contains water that can cause the bleeding. Always test any paper you want to use before you get too far into your project, you would hate to ruin all that hard work.

Some people will use a manual paper cutter and use the ruler as a guide for the thickness of the paper strip. You must be very careful to keep the paper from moving while cutting so that it is the same width along the length of the strip.

There are those who will use a shredder to cut their paper instead of manually using a paper cutter to cut their strips. There are many shredders that cut paper into 1/8” strips. A word of caution, you need to be careful with the shredders, because many cut with jagged edges that are not the best for use with quilling. If you decide to attempt this, please test the shredder in the store before purchasing it to make sure it is what you need.

The advantage of cutting your own paper is that you can more easily match the color of your pattern to the background paper you are using on your project. This can be helpful for scrapbooking or for card making where you can use your scraps to create the embellishments or decoration.

The disadvantage is that it can be difficult to get all your strips the same width and if you are like me, cutting a straight line can be challenging – lol.

I have found that many people who teach classes cut their own paper for their students to use when first learning the basic shapes. This is done so that they do not use the real strips until they feel more comfortable with making the shapes. There has been a lot of information posted about shredders, if there is interest I can track it down for you.

As a side note: I prefer to buy my paper. I don’t have the time to cut it myself, and if I did, my ability to cut a straight line (even with a paper cutter) is not my forte. One exception, because there is always an exception, is when it comes to fringed flowers and some of the roses that I make. Some of the color variations in the scrapbook paper makes for great flowers!

I hope that you have found this helpful.

Enjoy!
Copyright (personal use) by Antonella DeFalco

Technorati Tags: , , , ,

Thứ Sáu, 13 tháng 7, 2007


One of the great things about quilling is that you can combine your quilled items to make an even more spectacular arrangement. Here is an example of combining two elements. You can click to get the instructions for how to make each of the elements:


Change the colors and see how much you can do and how quickly you can become enchanted with your creations.


Thứ Bảy, 7 tháng 7, 2007

Spreuer Flower Pattern
This is a neat flower I made using 2 strips of coordinating quilling strips. The pictures have instructions for each of the steps in creating the Spreuer Flower Petals.

Follow these instructions and make 6 flower petals.

Spreuer Flower Instructions
Step 1: Take 2 strips of 1.8 in (.3 cm) quilling strips. I selected Yellow and Orange for this project. I then glued the bottom of the strips together. I placed the yellow against the back of the Onion Holder Tool (refer to picture).

Step 2: Take the Yellow and go up to prong #5 and wrap the Yellow around the front and down to the starting point and glue at the bottom.

Step 3: Take the Orange and go up to prong #4, bringing it around the front and down to the starting point and glue at the bottom.

Speruer Flower Instructions
Step 4: Continue with the Orange and on the opposite side go up to prong #4, bringing it around the front and down to the starting point. Before you glue it at the bottom, cut or tear the orange near where it will be glued.

Step 5: Take the Yellow and go up to prong #3, bringing it around the front and down to the starting point and glue at the bottom.

Step 6: Continue with the Yellow and on the opposite side go up to prong #3, bringing it around the front and down to the starting point. Before you glue it at the bottom, cut or tear the Yellow near where it will be glued.

Repeat Steps 1 - 6 for each of the 6 Flower Petals.

Next, make the STEM:
  • Take an approximate 8 in (20.3 cm) length of 1/8 in (.3 cm) Green quilling strip.
  • Fold it in Half, gluing at the top where the strip is folded.
  • Take the strip and condition the ends so that they curl slightly, you can do this by running your fingernail over the end of the strip to create the curl.
  • TIP: Cut the ends at a slight angle, it makes the strip more delicate.
Finally the LEAVES:
  • 2 - 6 in (15.2 cm) 1/8 in (.3 cm) Green Teardrops
Arrange the Flower Petals into a circle (looks like the sun). Arrange the Stem and Leaves as shown in the photograph. The Fringed Flower is made with Yellow and Orange 1/4 in (.6 cm) wide quilling paper.

Enjoy!
Copyright Antonella DeFalco

Technorati Tags: ,, , , , , ,

Chủ Nhật, 8 tháng 4, 2007

easter card
For those of you who celebrate Easter, I wish you and your family a very blessed day.
I selected the following Bible verse to accompany this simple design:

"I am the resurrection and the life:
he that believeth in me, though he were dead, yet he shall live.
And whoever liveth and believeth in me shall never die."
John, 11.25

I was doing some research on crosses on the internet because I wanted to use this opportunity to depict a different type of cross than the one that is traditionally quilled. I have depicted what is called the Patriarchal Cross.

patriarchal cross
Here is a closeup of the cross I made using the Spreuer technique. Once created, I simply "scattered" roses about the cross. In keeping with doing something a bit different, I opted not to use the standard white in making the cross and instead went with a regal purple. I opted for a pastel color palette on this item.
quilled cross

Many happy wishes to everyone.

Enjoy!
Copyright Antonella DeFalco

Technorati Tags: , , , , , , , ,

Thứ Năm, 5 tháng 4, 2007

quilled gerbera daisy

A splash of color in every Gerbera Daisy...

Do you ever like to challenge yourself? Sometimes I think it is a lot of fun, so I limited myself to the following and decided to see what I could come up with:
  • Black card blank
  • Pink and Turquoise quilling strips
  • Pink, green, and yellow squares
  • White rectangle
  • Rhinestones

For each Daisy:
  • 5 - 6 inch (15.24 cm) Teardrops
  • Place all teardrops with the points touching in the center and glue
  • 1 - rhinestone (placed in the center)

The original card that I wanted to make was this simple color blocked design. I have deliberately included 2 versions of this card to show you how a simple scrapbooking/cardmaking ink drawn stitching can make a world of difference on your finished product.

You can see that these cards are the same except for the added "stitching" on the second card. This very easy to do pattern of "dot dash dot dash dot" (. _ . _ . _ . _) really adds a finishing touch to this card. Where as the first card looks ok, you realize when you see the second card that it could be that much better.

I think my favorite thing about this card is the rhinestones. I have come to appreciate rhinestones and that special something that they add to your projects. I challenge you to take some simple products and come up with your own designs.

Stay tuned tomorrow for a whole slew of cards that I made with these same supplies. Here is my favorite card of all the ones I made.

quilled gerbera daisy


Enjoy!
Copyright Antonella DeFalco

Technorati Tags: , , , , , , , ,

Thứ Tư, 4 tháng 4, 2007

Spring is here and everything is coming up Daisies. Well, it is a bit cold outside where I live, so not much is growing, but I know that soon the weather will become warmer.

I so much love daisies - especially the quilled ones. They are a perfect addition to a card or scrapbook page and you can always arrange them around a photograph. They are perfect for almost anything. My research says that we get the name daisy from the English translation of "daes eage" or "days eye." They symbolize "Innocence and joy," what a great Title for your scrapbook page.

I love the simplicity and all the vibrant colors that a daisy can be... especially with the Gerbera daisies. How much fun to be able to make a rainbow with your daisies?

I have had a lot of fun making daisies. Today I will post the basic daisy and tomorrow I will share with you my experiments with the Gerbera daisy.

Quilled Daisy

To make the basic 7-Petal Daisy you need the following:
7 - 12 inch (30.48 cm) Teardrops
1 - 24 inch (60.96 cm) grape roll
2 - 12 inch (30.48 cm) Teardrops
1 - strip of green for the stem

Note: When making flowers I tend to use an odd-number of petals. This is a common thing to do in design and is ultimately more pleasing.

Enjoy!
Copyright Antonella DeFalco

Technorati Tags: , , , , , , , ,

Thứ Hai, 22 tháng 1, 2007


This picture shows the fringed strips and the narrower strips and some examples of what the completed flowers look like.


Here are several examples of various fringes and angles.

Enjoy!
Copyright Antonella DeFalco

Technorati Tags: , , , , , ,

Chủ Nhật, 21 tháng 1, 2007

As mentioned in previous posts, a combination of the width of your fringes and the angle of your cuts changes the appearance of the final flower. When fringing by hand, you may find differences if you fringe many different strips. When using a Fringer machine, this does not happen because the machine maintains the tension and evenly pulls the strip through as it cuts the strip of paper.

Tip for those of us who fringe by hand: When working on a large project where you want to ensure more consistency with your fringed flowers, use more than one strip of quilling paper back to back. As you cut through the strips they will each have the exact same width and angle because you have cut them at the same time. As you select your strips to wrap, your fringed flowers will be similar in appearance.

This post is primarily a pictorial explanation, with the pictures containing written text and arrows to highlight what I am attempting to show. Words are wonderful, however, in this situation I think that the pictures will help to demonstrate more clearly what is being described.
Examples of fringed quilling strips
This photograph shows 4 examples, all using the same width quilling strips. The difference is in the size of the fringe and the angle of the cuts. This where we start. The pictures that follow show the steps you take in creating your fringed flower. I am demonstrating with a slotted tool because it is easier to take the pictures. Use whichever method is most comfortable for you when you wrap / roll your strips.


Wrapping a fringed strip


You will gently press the fringes down to create the final fringed flower. You can use your fingers or you can also use a needle tool or similar device to get more of a curled effect.

The pictures that follow show the same fringed flower. In one example, the flower is made using only the fringed strip. In the second example, you see the flower with what I have called a center strip. I have taken a narrower strip and glued it (front to back) with the fringed strip. I then begin rolling with the narrower strip and continue until reaching the end of the fringed strip. As you can see, it gives your flower a nice center.

I have included more pictures of fringed flowers so that you can see the effect of using different widths and angles in your cuts. I have also previously posted a basic example of making fringed flowers.

I hope you enjoy making fringed flowers!
Enjoy!
Copyright Antonella DeFalco

Technorati Tags: , , , , , ,

Thứ Bảy, 6 tháng 1, 2007


I have previously posted instructions about the basics of making fringed flowers. For more information about Fringed Flowers also check out the detailed instructions for making fringed flowers. I have included more pictures of fringed flowers so that you can see the effect of using different widths and angles in your cuts.

There are a multitude of options for your fringes and they type of flowers you can make, this post will explain some of these differences and show you how it affects the way your "fringes" look.


The basic components to making a fringed flower are:
  • The actual "fringe" on your strip - how wide are your cuts? If they are close together the flower is more delicate and wispy looking
  • The angle of the "fringe" - the look of the fringed flower changes as the angle of your cut deepens
  • There is one other aspect and that is the length of the strip. I have found that for many fringed flower designs you do not necessarily need long strips. I use mostly 4 - 6 inch strips.
After you have created the fringe, you then need to consider the options for rolling the strips:
  • Will you use only the fringed strips?
  • Will you use one or more colors?
  • If you use more than one color will you keep the strips end to end or will you roll them together so that the colors mix and create a shading in the fringe.
  • Will all of your strips be the same width?
  • Will you add a thinner width strip to the front of your flower to create a center?
As you can see, the art of the fringed flower can appear overwhelming. There are so many options and opportunities to make them truly unique. This article is only the starting point for ideas with your fringed flowers. In my next post we will explore some of these options in greater detail as well as more pictures of fringed flowers with different angles and widths.

Relax, remember that this is fun!

Please write to me!
Copyright Antonella DeFalco

Technorati Tags: , , , , ,

Thứ Sáu, 8 tháng 12, 2006


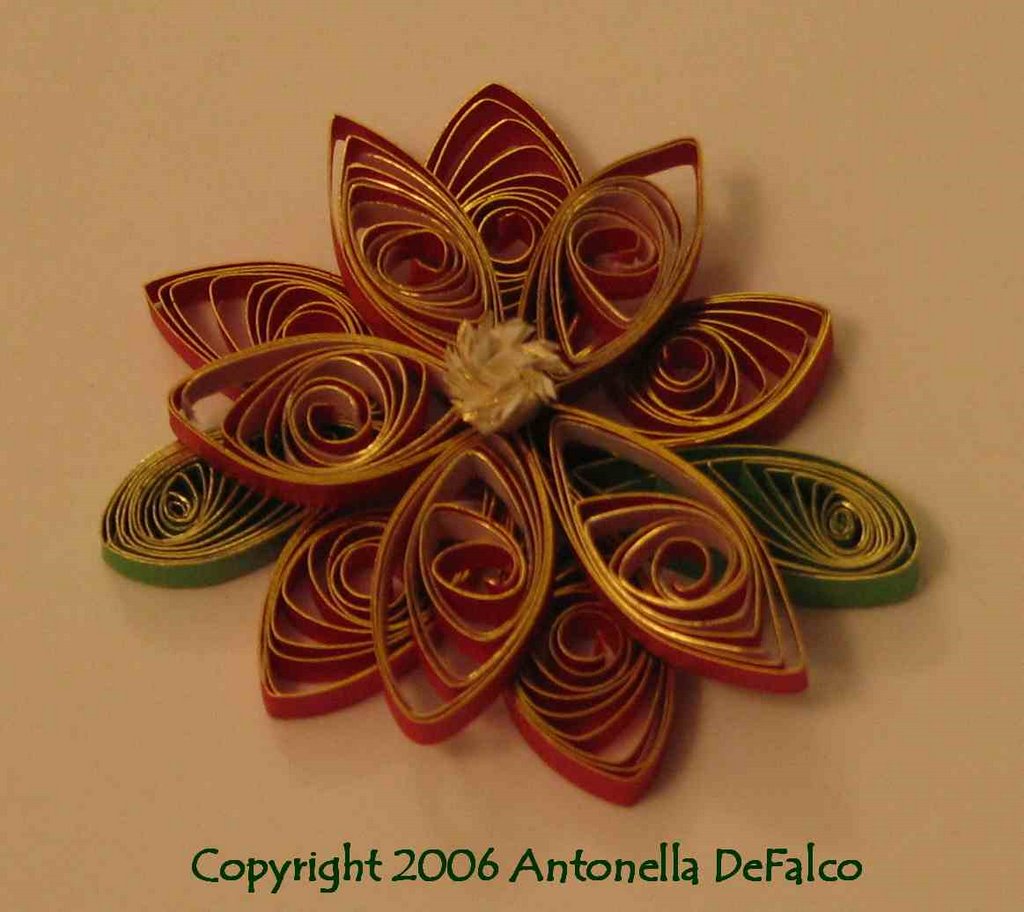
On the 8th day of quilling we made a gilded poinsettia.

The more I use this beautiful gilded paper, the more I love using it. Look at how it adds pop to this poinsettia. This project layers the leaves and the center portion of the poinsettia.

To make this project you need the following:
Start with:
  • 5 - 9 inch ( cm) marquis
  • Place them so that all the points meet in the center

On top of this, layer the following:
  • 5 - red and white marquis
  • 5 - 3 inch white
  • 5 - 6 inch (15.24 cm) red
  • Place the white strip inside the red strip and roll them together. For this project I did not glue the two strips together.

at the very top add
  • 1 - 3 inch (7.62 cm) fringed flower

For the leaves I used
  • 2 - 9 inch ( cm) teardrops
  • Place them where you want. The green adds a nice dash of color.

These are great to adorn your cards, or perhaps turn them into an ornament and hang them from the tree.

Enjoy!
Copyright Antonella DeFalco

Technorati Tags: , , , , , , , , ,

Chủ Nhật, 3 tháng 12, 2006

free quilling pattern advent wreath
On the third day of quilling we will make a Winter Wreath

In honor of Advent, I thought it appropriate to make a wreath. You can click on Fringed Flowers if you need help with making the flowers.

To start with, I punched a 1-1/2 inch (3.82 cm) circle and then cut the center out. Refer to the photo at the end of this post showing the back of the wreath. For the fringed flowers I used 3/8 inch (.95 cm) wide paper. The shine that you can see in the photos is from the metalic paper that I used.

free quilling pattern fringed flower
The fringed flower at the top of the wreath is made in the following way:
1 - 3 inch (7.62 cm) tight coil
1 - 3 inch (7.62 cm) White fringed strip
1 - 4 inch (10.16 cm) Green fringed strip
Glue the white and green fringed strips together at one end. At the end that is glued together, glue it to the red strip. Beginning with the red, roll the paper, keeping it tight and gluing it together.
After the glue has dried, place the flower on a hard surface and gently push down on the fringe so that they are

free quilling pattern fringed flower
The remaining 5 flowers are arranged around the wreath and are made in the following way:
1 - 3 inch (7.62 cm) tight coil
1 - 2 inch (5.08 cm) White fringed strip
1 - 3 inch (7.62 cm) Green fringed strip
Glue the red, white and green strips together end-to-end Beginning with the red, roll the paper, keeping it tight and gluing it together.
After the glue has dried, place the flower on a hard surface and gently push down on the fringe so that they are spread out as shown.

To fill in the wreath, I did the following:
8 or more - 3 inch (7.62 cm) teardrops that are placed between the fringed flowers to fill in the design.
1 - 3 inch (7.62 cm) heart, see photo for placement
2 - 3 inch (7.62 cm) curled strips (see photo). Cut the ends at an angle, and weave through the wreath for added color

free quilling pattern advent wreath


Enjoy!

Copyright Antonella DeFalco

Technorati Tags: , , , , , , , ,

fringed flower quillingFor many of my designs, I like to use Fringed Flowers. Early on in my quilling, I found that I liked these flowers. It may have been because they look difficult, however they are easier than they appear.

If you are unsure how to make fringed flowers these instructions are for you. For more information about Fringed Flowers also check out the Basics of Fringe Design and detailed instructions for making fringed flowers. I have included more pictures of fringed flowers so that you can see the effect of using different widths and angles in your cuts.


The important thing to remember with fringed flowers is that the width of the paper that you use is not important. You can use 1/8 in (.3cm), 1/2 in (1.27 cm), 3/8 inch (.95 cm) or any size in between or wider. The difference is in the size of the flower. When deciding what width paper to use, think about the size of your pattern or item that you are quilling and select a width that is in proportion to your project size. The various photos that I have shared show you how different each quilled flower can look. The possibilities are endless.

There are machines called "fringers" that will fringe your paper for you. I do not use one, instead I hand fringe my strips. These instructions are provided for those of you who are hand fringing your paper.

The tools that I use are small scissors (these can be craft scissors, nail scissors, or childrens scissors). I recommend something that has a nice sharp cut. Since many of you have nail scissors, start with those. If you are a paper piecer, then you already have the appropriate tools.
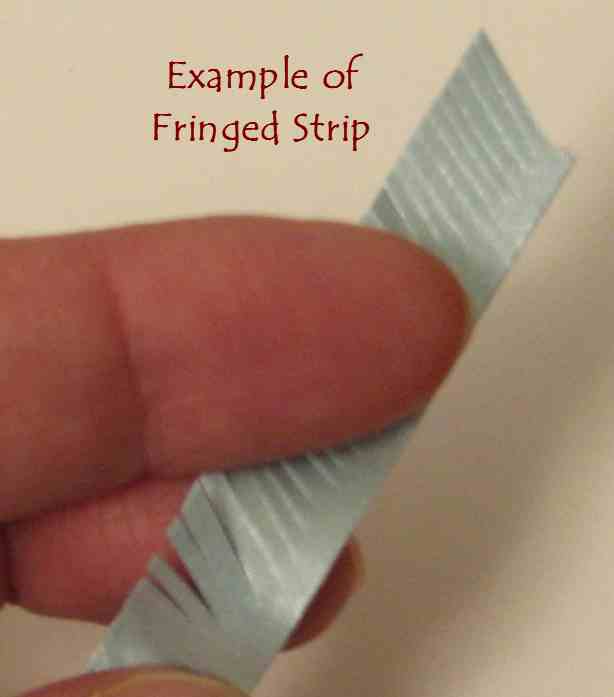
fringed flower quillingTo start, take your scissors and cut tiny cuts approximately 3/4 of the way through the width of the strip. It looks something like this ||||||||||||||||||||||||, please refer to the picture for a close up of an actual fringed strip. The closer (or thinner) you make your cuts, the more delicate the flower will look.
fringed flower quilling
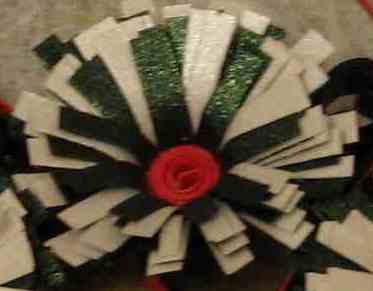
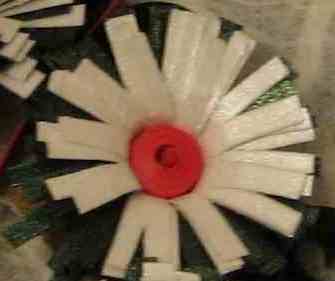
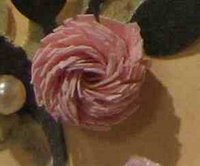
After you have cut your strip, you can begin making your coil. Referring to this picture, if you start your coil using the strip that has been cut, your flower will look like this. For this flower, I did not press the fringed pieces down. They naturally lined up this way because I cut my fringes at a slight angle.
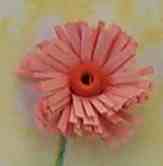
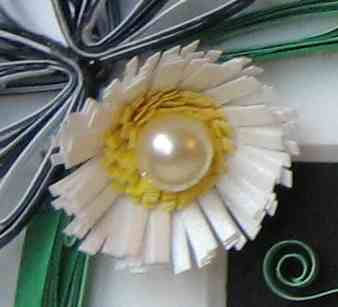
fringed flower quillingIf instead, you add a strip of uncut paper and glue it to your fringed strip and begin rolling from the uncut paper, it will look like this picture. You may prefer this look or you may make your flowers this way because it is easier to start with the uncut strip, in this case a 1/8 inch (.3 cm) width paper, and make a tight coil at the beginning. This makes rolling the fringed strip which is glued to the uncut paper easier. Once you have rolled and glued the strips and the glue has dried, place the flower on a hard surface and gently press down on the fringes and flatten them as shown in this picture. You can also take your needle tool or a pin and slightly curve the ends for a more rounded look.

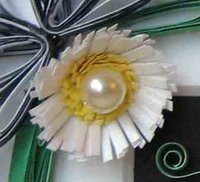
One of my favorite things to do is to add little pearls in the center of my fringed flowers. I think it adds that bit of charm to the overall appearance.

For more information about Fringed Flowers check out the Basics of Fringe Design and instructions for making fringed flowers.


fringed flower quillingEnjoy!

Copyright Antonella DeFalco


Technorati Tags: , , , , , , ,

nghe nhạc trực tuyếnNấu món chay | học nấu ăn DJ - Ảnh đẹp | xalotinnhanh